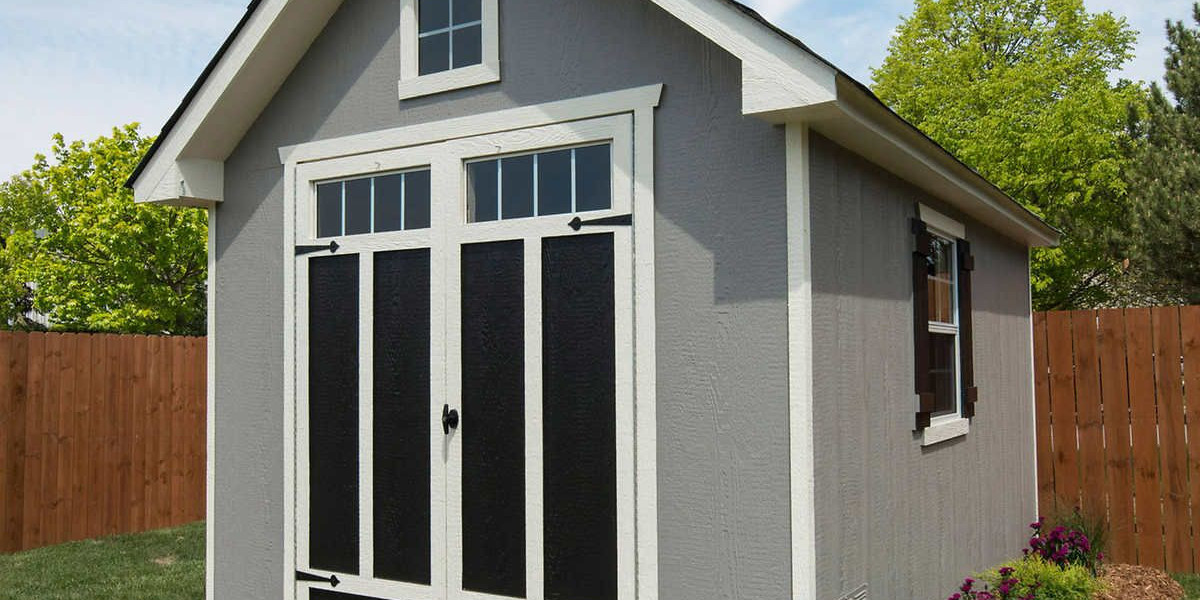
Smart Shed Tech: How to Add Security, Solar Power & Automation to Your Shed
A shed is no longer just a place to store tools or garden supplies. With modern technology, you can turn your shed into a smart, secure, and energy-efficient space. By adding security systems, solar power, and automation, you can make your shed a functional hub for work, hobbies, or storage. This guide explains how to upgrade your shed with these features in simple steps, ensuring it’s practical and tailored to your needs. Let’s explore how to bring your shed into the future with smart tech, with insights from shed construction Michigan experts.
Why Upgrade Your Shed with Smart Technology?
Smart technology makes your shed more than a storage box. It adds convenience, saves energy, and protects your valuables. Security systems deter thieves, solar power cuts electricity costs, and automation simplifies daily tasks. Whether you use your shed for gardening, a workshop, or a retreat, these upgrades boost its value and usability. Plus, a smart shed can increase your property’s appeal, especially when built by a trusted shed construction Michigan company.
Adding Security to Your Shed
Keeping your shed secure protects expensive tools, equipment, or personal items from theft. Modern security systems are affordable and easy to install, making your shed a tough target for intruders.
1. Install a Smart Lock
A smart lock lets you control access with your smartphone, eliminating the need for physical keys that can be lost or stolen.
How to Do It:
Choose a Bluetooth or Wi-Fi-enabled smart lock, like a keypad or biometric model ($50 to $150). Keypad locks use a code, while biometric locks use fingerprints for extra security.
Install the lock on your shed door, following the manufacturer’s instructions. Most require a screwdriver and take 10 to 20 minutes.
Download the lock’s app to set codes, grant access to others, or lock/unlock remotely.
Look for models with tamper alarms or auto-locking for added protection.
Benefits: You can monitor who enters your shed and lock it from anywhere, perfect for remote properties.
2. Add Motion-Activated Cameras
Security cameras with motion sensors keep an eye on your shed 24/7, sending alerts to your phone if someone approaches.
How to Do It:
Buy a wireless, battery-powered camera with motion detection, like Reolink or Blink ($50 to $200). Choose models with smart person/vehicle detection to avoid false alerts from animals or weather.
Mount cameras around your shed’s perimeter, focusing on the door and windows. Use screws or adhesive mounts for easy installation.
Connect the camera to your Wi-Fi and app to view live footage or recordings.
Consider cameras with SD card storage or cloud subscriptions for saving video.
Benefits: Cameras deter intruders and provide evidence if a break-in occurs. Motion alerts keep you informed even when you’re away.
3. Use Smart Lighting
Motion-activated smart lights scare off intruders and make it easier to access your shed at night.
How to Do It:
Install solar-powered or battery-operated motion lights ($20 to $50) above the shed door or around the perimeter.
Connect to a smart system like Philips Hue or PowerBee for app control or schedules.
Set lights to turn on at dusk or when motion is detected, creating the illusion someone’s home.
Pair with cameras for a combined security effect—lights activate when sensors detect movement.
Benefits: Lights improve safety and visibility while saving energy with solar or LED options.
Adding Solar Power to Your Shed
Solar power turns your shed into an off-grid powerhouse, running lights, tools, or appliances without costly wiring from your home. It’s eco-friendly and saves money over time.
1. Choose a Solar Kit
Solar kits are the easiest way to add power, including panels, batteries, and inverters for a complete system.
How to Do It:
Pick a kit based on your needs:
DC System ($100 to $300): Powers low-voltage lights or small devices. Ideal for basic storage sheds. Needs a 50W to 100W panel.
AC System ($3,000 to $5,500): Runs power tools, heaters, or appliances (400 to 800 watts). Best for workshops or offices.
Buy from brands like Jackery, EcoFlow, or Home Depot’s Tuff Shed kits ($300 to $12,000 for pre-built sheds).
Ensure your shed’s roof faces south and gets enough sunlight. Check for shade from trees or buildings.
Cost: $100 for basic lighting; $3,000+ for robust systems.
2. Install Solar Panels
Mounting panels correctly ensures they capture sunlight efficiently.
How to Do It:
Place panels on the shed roof or a nearby stand if the roof isn’t ideal. Use monocrystalline panels for better efficiency ($100 to $650 per panel).
Secure panels with brackets, following kit instructions. This takes 1 to 2 hours with basic tools.
Connect panels to a charge controller, battery, and inverter (included in kits) to store and convert energy.
Clean panels twice a year with a hose to remove dirt or snow for optimal performance.
Benefits: Solar power eliminates wiring costs, reduces electricity bills, and adds value to your property (up to $20 per $1 spent on panels).
3. Add Battery Storage
Batteries store solar energy for use at night or during cloudy days, ensuring constant power.
How to Do It:
Choose a battery like a 12V 35Ah AGM or 100Ah lithium-ion ($100 to $1,000), depending on your power needs.
Connect the battery to the solar kit’s charge controller, following the manual.
Place the battery in a weatherproof box inside the shed to protect against rodents or moisture.
Monitor battery health via the kit’s app or display for maintenance.
Benefits: Batteries keep your shed powered during outages or bad weather, perfect for remote locations.
Adding Automation to Your Shed
Automation makes your shed easier to use by controlling lights, locks, or appliances with apps, voice commands, or schedules.
1. Install a Smart Home Hub
A hub connects your shed’s smart devices, letting you control them from one app or with voice assistants like Alexa or Google Home.
How to Do It:
Choose a hub like Amazon Echo Dot or Google Nest Mini ($30 to $100).
Connect the hub to your shed’s Wi-Fi (you may need a Wi-Fi extender, $20 to $50, for weak signals).
Link smart locks, lights, and cameras to the hub via their apps.
Set routines, like “turn on lights at 6 p.m.” or “unlock the door when I arrive.”
Benefits: Simplifies control of multiple devices and adds voice or remote access.
2. Automate Lighting and Outlets
Smart lights and outlets can turn on/off automatically, saving energy and enhancing security.
How to Do It:
Replace regular bulbs with smart LED bulbs ($10 to $30) or add smart outlets ($15 to $50) for appliances.
Use apps to set schedules (e.g., lights on at dusk, off at dawn) or geofencing to activate devices when you’re near.
Pair with motion sensors for automatic lighting when you enter the shed.
Benefits: Reduces energy use and mimics activity to deter thieves when you’re away.
3. Add Smart Sensors
Sensors monitor your shed’s environment, like temperature or humidity, to protect stored items or plants.
How to Do It:
Install a smart temperature/humidity sensor ($20 to $50) like Govee or YoLink.
Connect to your smart hub or app to get alerts if conditions change (e.g., too cold for plants or too humid for tools).
Place sensors inside the shed, away from direct sunlight or drafts.
Benefits: Protects gardening supplies or electronics from damage and keeps you informed remotely.
Tips for a Smart Shed Project
Check Sunlight: Ensure your shed gets enough sun for solar panels. South-facing roofs are best.
Plan for Wi-Fi: Use a Wi-Fi extender if your shed is far from your router to ensure smart devices work.
Start Small: Begin with a basic solar kit or one smart device and expand as needed to manage costs.
Hire Pros if Needed: For complex installations or custom builds, work with a shed construction Michigan company to ensure quality and code compliance.
Follow Local Codes: Check Michigan’s zoning and permit rules, especially for sheds over 200 square feet or with electrical systems. You may need permits ($50 to $150).
Common Mistakes to Avoid
Skipping Permits: Electrical or large sheds may need permits. Check with your local building department to avoid fines.
Ignoring Roof Strength: Ensure your shed’s roof can support solar panels. Get a structural clinker structural review if unsure.
Poor Panel Placement: Don’t install solar panels in shaded areas; they need full sun to work well.
Overloading Batteries: Match battery size to your power needs to avoid shortages.
Using Cheap Devices: Invest in quality smart locks or cameras to ensure reliability and security.
Why Smart Shed Tech Is Worth It
Adding security, solar power, and automation to your shed makes it more functional, secure, and eco-friendly. A $100 solar kit can power lights, while a $50 smart lock protects your tools. Automation saves time and energy, letting you focus on using your shed. These upgrades can increase your property’s value and save on electricity costs over time.
Final Thoughts
Turning your shed into a smart, secure, and solar-powered space is easier than you think. With simple additions like smart locks, motion cameras, solar kits, and automated lights, you can make your shed a modern, efficient hub. Whether you’re storing tools, gardening, or working on projects, these upgrades add convenience and safety. Partner with a shed construction Michigan company to build or retrofit a shed that supports these technologies. Start planning your smart shed today, and enjoy a more secure, powered, and automated space that fits your lifestyle!