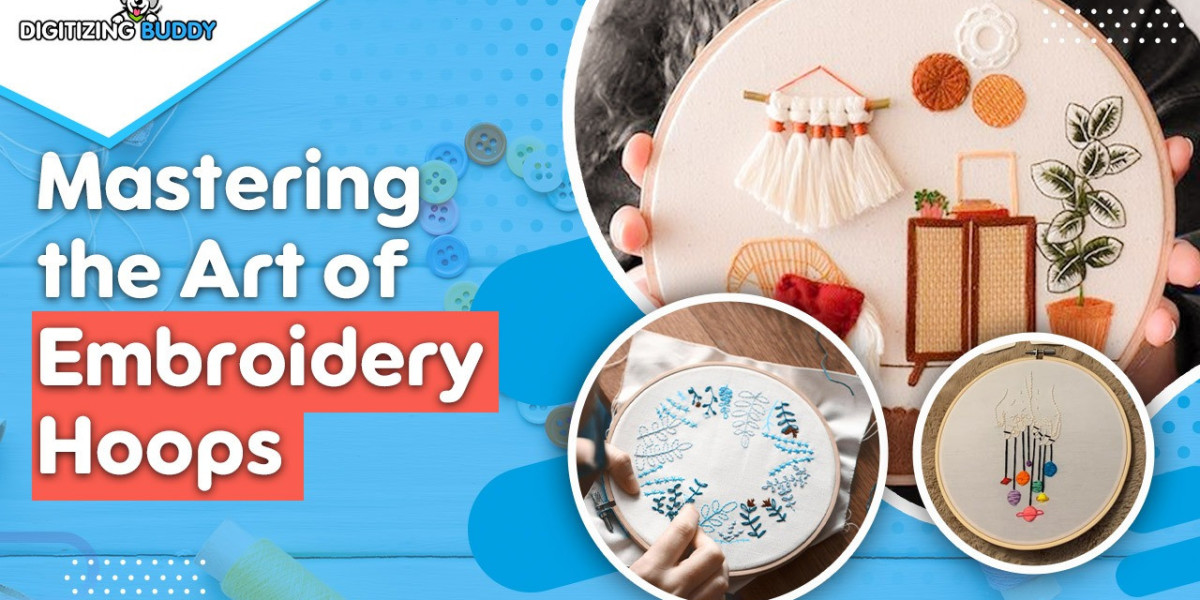
You've got your design loaded, your thread colors picked out, and your fabric ready to go. But before that first stitch hits the cloth, there's one make-or-break step: hooping. Get this wrong, and even the most beautiful design can turn into a puckered mess. Get it right, and you set the stage for embroidery magic.
Embroidery hoops aren't just round pieces of plastic or wood—they're precision tensioning devices that can vary as much as the projects they hold. From classic spring hoops to high-tech magnetic versions, choosing the right types of embroidery hoops is like selecting the perfect paintbrush for an artist.
The Humble Workhorse: Traditional Hoops
These are the hoops that come with most embroidery machines—simple plastic or wooden rings with a tightening screw. They're affordable, reliable, and have been holding fabric taut for centuries. But don't let their simplicity fool you. There's an art to using them right:
- Wooden hoops absorb vibration better than plastic, giving cleaner stitches on heavy fabrics
- Plastic hoops are lighter and often have measurement markings for precise placement
- The screw should be tightened just until you hear fabric "sing" when tapped—overtightening warps the hoop
Pro tip: Wrap wooden hoops with bias tape to prevent marking delicate fabrics. For plastic, a light sanding on the inner ring improves grip.
Spring Into Action: Spring Tension Hoops
These game-changers use internal springs rather than screws to maintain even pressure. Just press down and the hoop snaps into place with consistent tension every time. They're perfect for:
- Production work where speed matters
- Quilters adding embroidery to large pieces
- Anyone with arthritis or hand strength issues
The downside? They don't accommodate thick fabrics as well as traditional hoops. But for most everyday projects, they're a fingertip-saving miracle.
Magnetic Revolution: No-Slip Hooping
Imagine hooping without screws, springs, or wrestling matches with stiff fabric. Magnetic hoops use powerful neodymium magnets to hold fabric securely while allowing instant repositioning. They shine for:
- Odd-shaped items that won't fit standard hoops
- Multi-hooping large designs
- Embroiderers who frequently change projects
The catch? They're heavier than other options and work best with specialized stabilizers. But once you've tried floating a tricky item like a shoe or stuffed animal with magnets, you'll wonder how you ever hooped without them.
Specialty Shapes: Beyond the Circle
Round hoops get all the attention, but other shapes solve specific problems:
Oval hoops
- Perfect for long text or floral vines
- Give 30% more stitching area in the same machine space
- Require careful design centering
Square hoops
- Ideal for geometric patterns
- Maximize corner-to-corner design size
- Can cause more fabric distortion at the corners
Rectangle hoops
- Great for monograms and borders
- Allow larger designs without multiple hoopings
- Need extra stabilization at the long edges
These specialty hoops often require adapter frames but can dramatically expand your creative options.
Size Matters: Choosing Your Hoop Arsenal
Hoop sizes aren't one-size-fits-all. A well-equipped embroiderer maintains a range:
- Small (4" or less): For delicate work on cuffs, collars, and baby clothes
- Medium (5-6"): The workhorse for most logos and motifs
- Large (7" and up): For full-chest designs and detailed scenes
Here's a little-known fact: Using a slightly larger hoop than necessary actually improves results by giving the machine more room to move. That 4x4 design will stitch cleaner in a 5x7 hoop than a 4x4.
The Heavyweights: Industrial Hooping Solutions
Home embroiderers aren't the only ones who need quality hooping. Commercial operations rely on:
Multi-head hoops
- Hold fabric for multiple machines simultaneously
- Maintain perfect alignment across garments
- Often custom-made for specific products
Cap frames
- Specialized curved hoops for structured caps
- Available in different crown heights
- Some feature adjustable tension for different cap materials
Jumbo hoops
- Accommodate entire blankets or banners
- Require industrial machine arms
- Use vacuum tables to keep fabric stable
These professional solutions show how proper hooping scales from hobbyist to factory production.
Hooping Hacks for Tricky Fabrics
Some materials laugh at standard hooping techniques. Here's how the pros handle them:
Stretchy knits
- Hoop stabilizer first, then lightly adhere fabric with temporary spray
- Use cutaway stabilizer larger than the hoop
- Reduce top tension slightly
Slippery silks
- Sandwich between two layers of water-soluble stabilizer
- Use wooden hoops with extra-fine teeth
- Starch fabric lightly before hooping
Terry cloth and fleece
- Hoop tearaway stabilizer tightly
- Float fabric with adhesive spray
- Use a topping to prevent stitches from sinking
Leather and vinyl
- Specialized non-piercing clamps instead of traditional hoops
- Stick-on stabilizer backings
- Always test punch settings on scraps first
The Future of Hooping
Innovation continues to reshape this ancient tool:
- Smart hoops with tension sensors that alert when pressure isn't optimal
- Auto-adjusting hoops that maintain perfect tension as fabric shifts during stitching
- Modular systems that let you build custom hoop shapes as needed
But even as technology advances, the core principle remains: Proper hooping creates the foundation for embroidery excellence. Whether you're using a vintage wooden hoop or a space-age magnetic system, that moment when you achieve perfect tension still feels like magic.
So next time you're tempted to rush the hooping process, remember—every perfect stitch begins with a perfectly hooped piece of fabric. Take that extra minute to get it right, and your embroidery will thank you with results worthy of display. After all, the hoop isn't just holding your project—it's holding your potential.


Sameer Digitemb 28 में
Hoop It Right: A Guide to All Types of Embroidery Hoops explains how choosing the correct hoop improves stitch quality and alignment. Using the right hoop is essential for producing clean, professional cusotm embroidery patches with consistent results.
https://digitemb.com/custom-embroidery-patches/